  Electronically signing the T183 and TP-1000 in DT Max |
Before you can electronically transmit a client's tax return, you need to get the
T183 form signed for the federal copy, and the TP-1000 for the Québec copy, if
applicable. With the current COVID-19 virus situation, clients may be reluctant
to come to your office to do this. Thankfully, the CRA and RQ have changed the
legislation to temporarily allow electronic signatures. Here's how you can take
advantage of this in DT Max. There are separate instructions depending on whether
you are using a locally installed email program or webmail.
Sending the PDF using a locally installed email program (e.g., Outlook, Thunderbird, etc.)
-
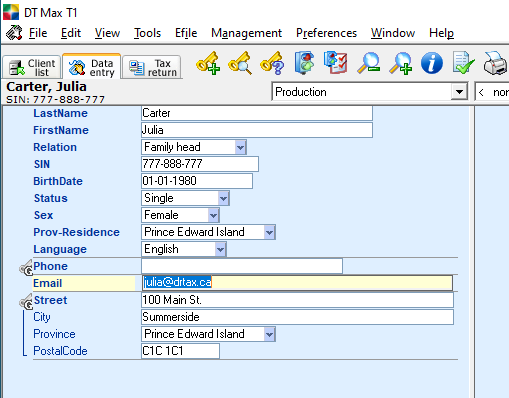
You will need to have your client's email address.
You can use the EMAIL keyword to keep track of it.
-
On the Tax Return screen, select the
 icon.
icon.
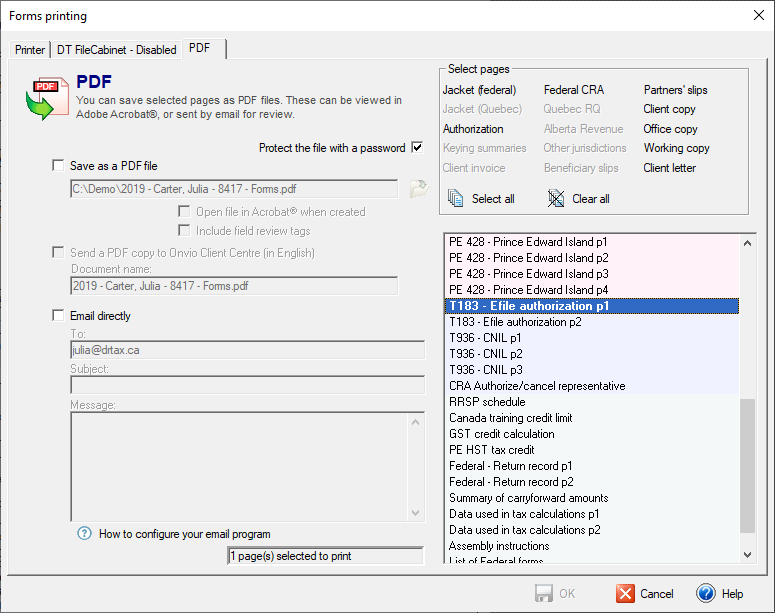
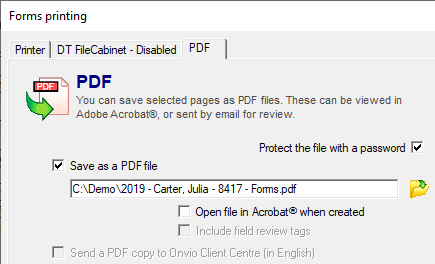
This will open the Forms printing window with the PDF tab selected.
Note: Documents generated using Forms Printing will be in the same language as DT Max. Make sure that DT Max is set to the correct language for your client.
-
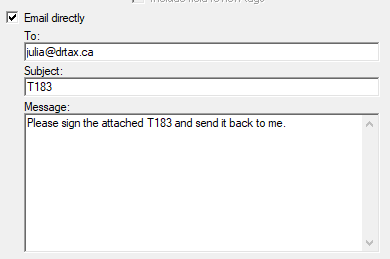
Check the Email directly box.
Enter a Subject and a Message for the email.
The To field will already be filled in if you entered a value in the EMAIL
keyword. If not, you can enter it directly here. You can also change it if needed.
-
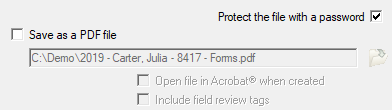
It is highly recommended that you password-protect the PDF file.
You can do
this by checking the Protect the file with a password box.
Email is
not a secure method of sending data, and adding a password increases security.
-
On the right-hand side, you will want to select the T183 (and possibly the
TP-1000) from the list of forms. To make sure that you are not including
any other forms, click on
 first. Then, you can select the forms to send.
Note: Holding down the CRTL key while clicking on a form will also unselect the form.

-
Click the
 button at the bottom of the window.
-
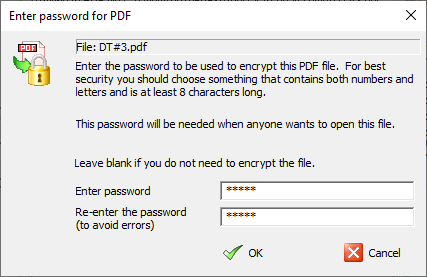
If you chose to password-protect the PDF (highly recommended), a new window will
open where you can enter the password.
-
Click the
 button at the bottom of the window.
-
DT Max uses your default email
program to send the email. In most cases, this will be Outlook. For
security reasons, Outlook needs your authorization before sending
the email.
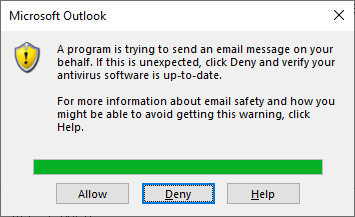
Click on Allow, and the email will be sent to your client.
Sending the PDF via webmail (e.g., Gmail, Yahoo!,
Hotmail, etc.)
Webmail is an email service that
can be accessed using a standard web browser. Examples of webmail
providers are Gmail, Outlook.com, Hotmail.com and Yahoo! Mail. The
procedure for sending the PDF via webmail is very similar to the
procedure when using a locally installed email program.
-
Complete step 2 above.
-
Instead of selecting Email directly, check the box for Save as a PDF file.
-
Enter a path and filename for
where you want to save the PDF. To make sure that that path is
correct, it is recommended that you browse to the folder using the
 button.
-
Complete steps 4 – 8 above.
-
Start your email program (e.g.,
Gmail).
-
Start a new email message as
you normally would.
-
Attach the PDF file that you
saved to your computer.
-
Complete the rest of the email
and send it to your client.
Password-protected PDF files
If you
password-protected the PDF file before sending it (highly recommended),
you will need to communicate the password to your client. The safest
way would be verbally in a telephone call. As an alternative, you could
send it via a text message. As a last resort, you could send it by email
(be sure not to send it in the same email that you are using to send the PDF).
For clients who have not yet dropped
off their tax information at your office, you could ask them when
they come in whether they would like to receive the T183 (and
TP-1000) by email. If so, you could give them the password in person
before they leave your office.
Electronically signing the T183 (and TP-1000)
The client should follow the
following steps to electronically sign the PDF and return it to
you. They can either do it using Microsoft Edge, or Adobe Acrobat
Reader DC.
Note: A PDF containing the client instructions can be downloaded here:
http://support.drtax.ca/dtmax/eng/kb/dtmax/eng/E-signature-TP-1000-T183-Client-copy.pdf
You can send either the link or the PDF to your client.
Microsoft Edge
-
Save the PDF file to the computer.
-
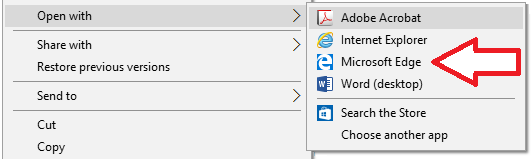
Find the file in File Explorer.
-
Right-click the file and select
Open with Microsoft Edge.
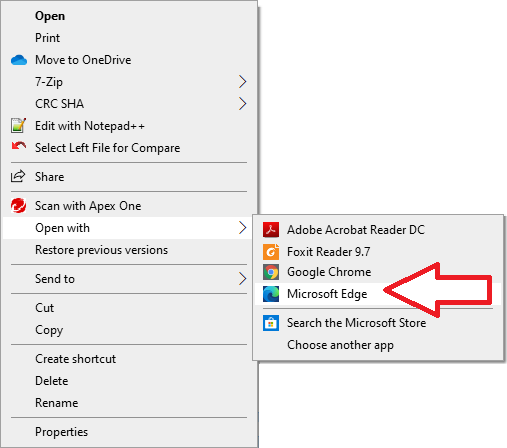
The icon might look different depending on which version of Microsoft
Edge you have installed.
-
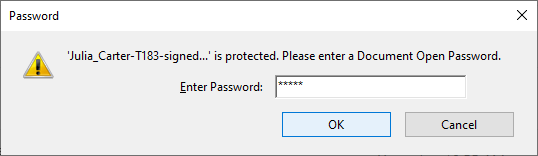
Enter the password.
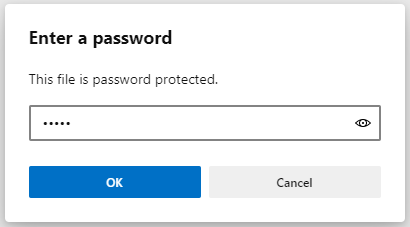
-
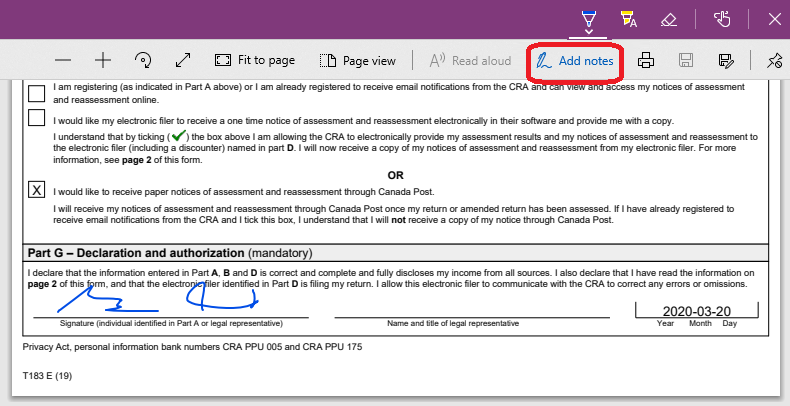
Use the Draw tool to sign the document.
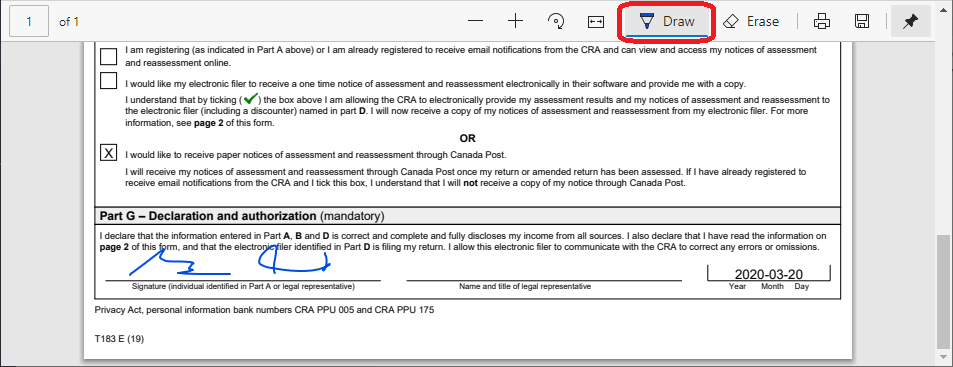
With older version of Microsoft Edge, use the Add notes tool.
-
Save a copy of the signed PDF
by clicking the
 icon. Choose a different name.
For older versions of Microsoft
Edge, use the Save As
 icon.
icon.
The document will be saved as a password-protected file.
-
Email the signed PDF back to the tax preparer.
Adobe Acrobat Reader DC
If the client doesn't already have
Adobe Acrobat Reader DC installed, they can download it here:
https://get.adobe.com/reader/
-
Save the PDF file to the
computer.
-
Find the file in File
Explorer.
-
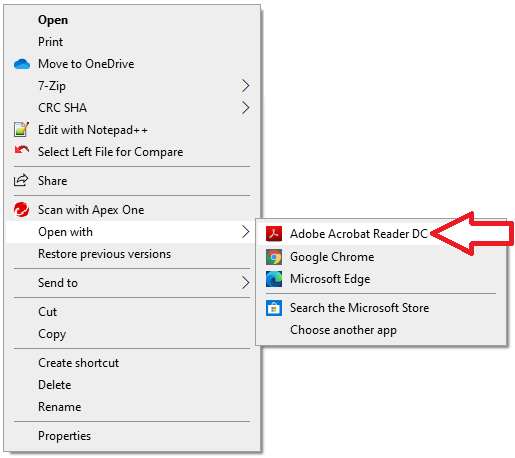
If Adobe Acrobat Reader DC is
the default PDF reader, double-click the file to open it in Adobe
Acrobat Reader DC. If not, right click the file and select Open with Adobe Acrobat Reader DC.
-
Enter the password.
-
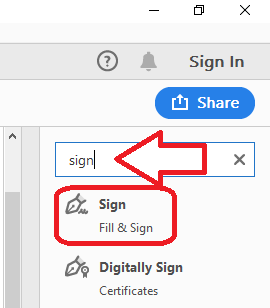
On the right-hand side, type
"sign" in the search field and select Sign from the
search results.
-
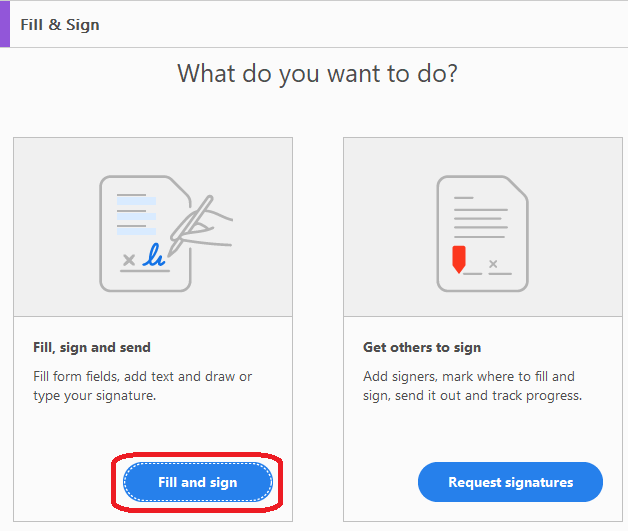
On the Fill & Sign
screen, click the Fill and sign button.
-
On the toolbar, select
Sign.

-
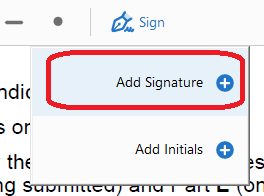
Click on Add Signature +.
-
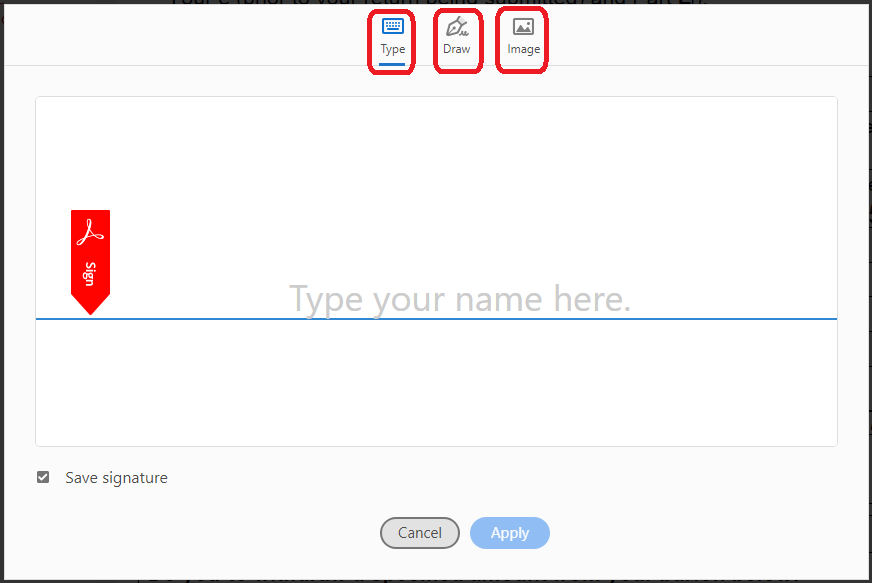
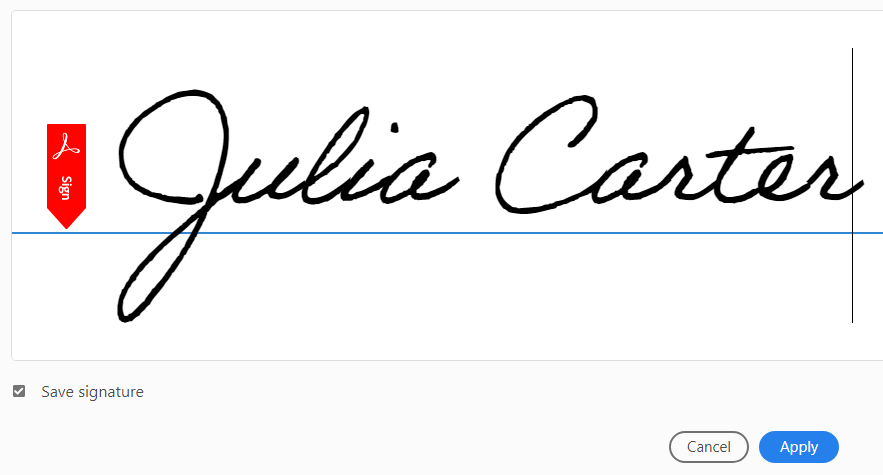
Either type the signature, draw it, or use an already saved image of the signature.
-
Click Apply after creating the signature.
-
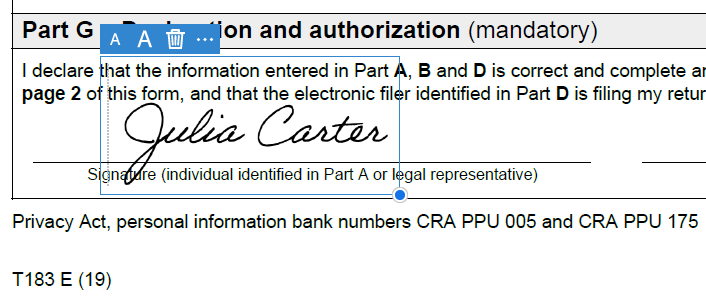
Add the signature to the appropriate spot on the document.
-
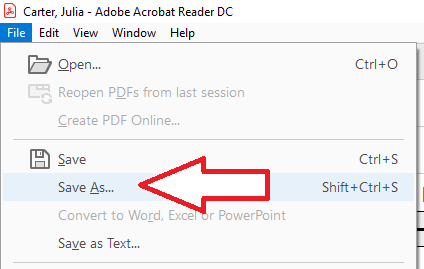
From the File menu, select Save As to save a copy of the signed document.
-
Email the signed PDF back to the tax preparer.
Getting the signed forms back from the client
Once you receive the email from the
client, download the signed PDF to your computer. You can keep track
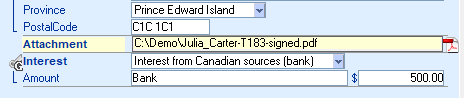
of it by using the ATTACHMENT keyword in DT Max. Enter the
path and filename for the signed PDF file.
April 9, 2020
|